Virtualization is a process through which you can run various instances and operating systems in a computer system virtually, without any effect on the primary operating system.
In Windows 10 operating system, you can easily enable virtualization. Windows 10 supports native hardware virtualization.
Virtualization on Windows is known as Hyper-v, and through Hyper-v, you can create and run multiple instances.
You can install another Windows operating system and do whatever test you want to do without messing with the primary window system.
You must know hardware and software requirements before enabling Windows 10 Virtualization.
Must Read:- How To Install WordPress On A Windows Local Computer?
Minimum System Requirements for Virtualization
| OS | Windows Server 2016 & above, Windows 10 PRO, Enterprise & Education |
| Architecture (Intel vt & AMD v) | x64 Bit with SLAT (Second Level Address Translation) |
| RAM | 4 GB Minimum |
Virtualization (Hyper-V) Compatability Check
In Windows, there are some easy ways to check, is that your Windows Laptop or PC supports virtualization or not? First, using CMD prompt or PowerShell, the second one is Windows programs and features, and lastly, the third one is the BIOS setting.
BIOS Virtualization should support your Windows PC, nor you can’t enable the Hyper-V feature. But you can still run multiple OS through Virtual Box; check out the article.
Execute the following command through CMD prompt or PowerShell
systeminfoCheck if your Windows PC or Laptop supports virtualization by executing a simple command on CMD prompt or PowerShell.
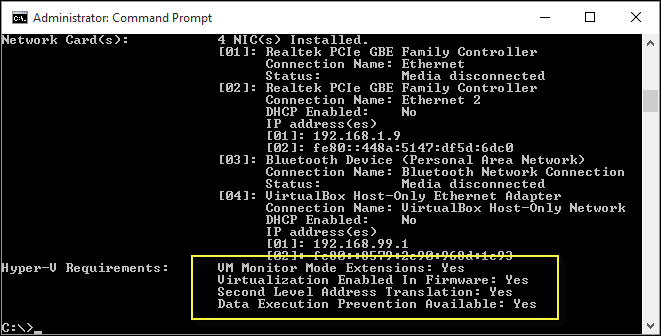
You can see all details about Virtualization. If you have already enabled Virtualization on your PC through BIOS or pre-enabled by the manufacturer, you will see this particular message.
Hyper-V Requirements: A hypervisor has been detected. Features required for Hyper-V will not be displayed.Check Windows Program and Features
Search ‘program’ on windows search, and you will see ‘Turn Windows features on or off.’ Open and now you can see the Hyper-V features as shown in the image below.
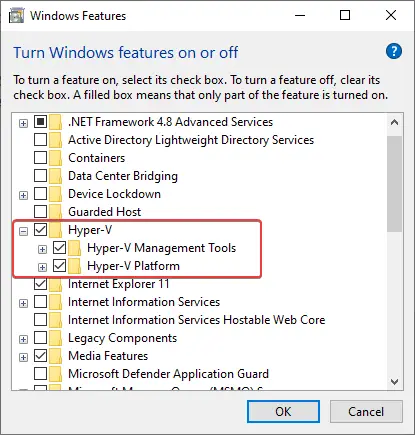
Keep in mind this feature will be available in limited editions of the Windows Operating System.
Open Task Manager For Virtualization
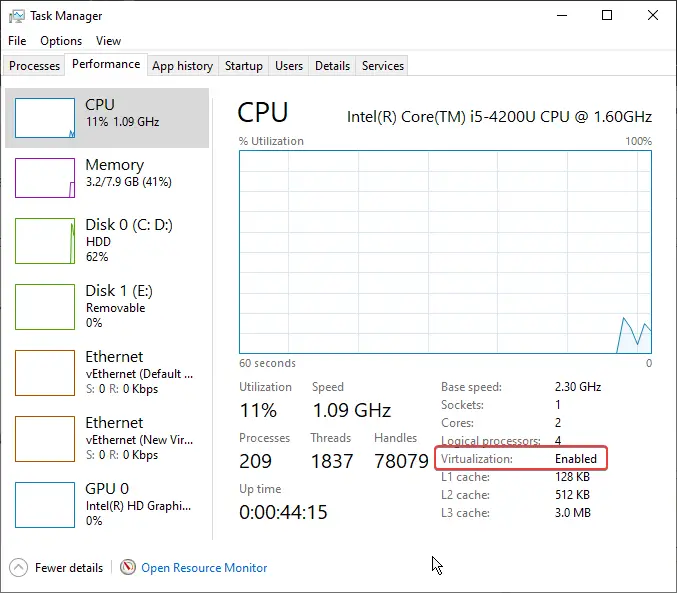
When you open the Windows PC task manager, it will show Virtualization enabled or not in the CPU section under the performance tab.
Enable Virtualization On Windows PC Step-By-Step
Enabling Virtualization Technology on your Windows PC is very simple, and you need to follow the exact steps. Before enabling Virtualization, you should know the minimum requirements and what is the specification of your computer.
At present, most Intel and AMD processors support Virtualization, so check the following method to check Virtualization’s compatibility above.
STEP – 1. Enable Virtualization on BIOS
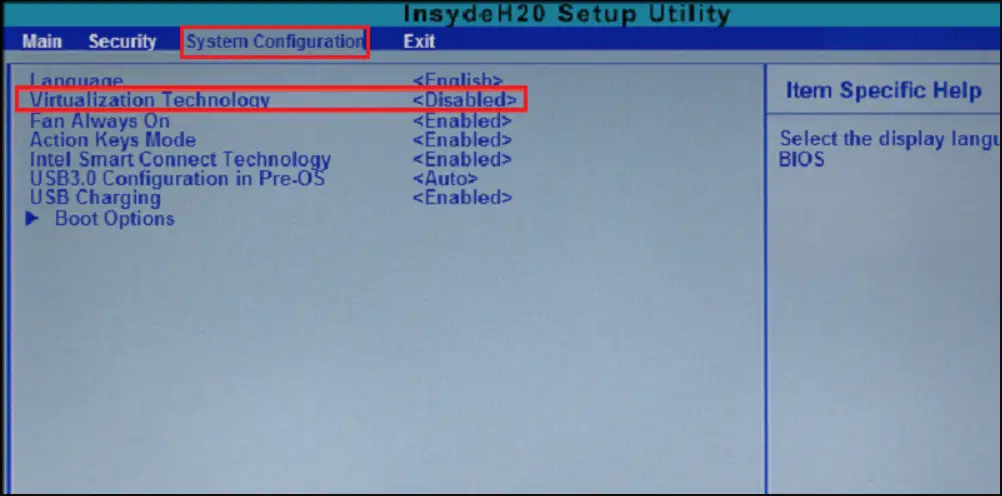
While most recent PCs and Laptops support hardware virtualization and enable hardware virtualization, you need to open your BIOS setting.
So reboot your computer; while rebooting (during black screen), you should press the manufacturer’s distinct key set. The key should be ‘Esc,’ ‘F1’, ‘F2’, ‘F9’, ‘F10’, ‘F12’, or ‘DEL’ key. I have mentioned all different manufacturer official links for BIOS setup in the references section.
STEP – 2. Enable Hyper-V Through Setting
Search ‘Program and features’ or ‘Windows features’ on search, then click on the first result ‘Turn Windows features on and off.’
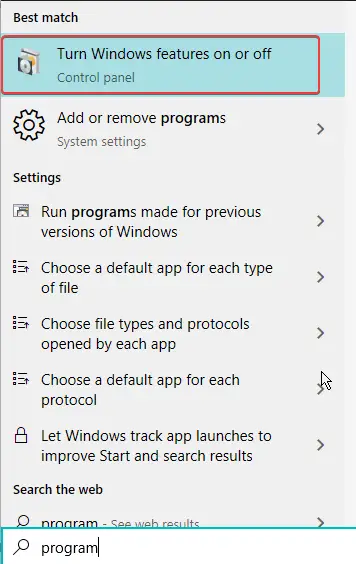
Select Hyper-V and click on ‘Ok,’ and it will take a little time to update.

Optional Method To Enable Virtualization In Windows 10
You can use Windows PowerShell and CMD prompt to enable the Hyper-V feature on your Windows 10 operating system. Once you have enabled Hyper-V using the Windows features tool, then no need to execute the command.
Enable Hyper-V using PowerShell
- Open PowerShell as Administrator
- Execute the following command
Enable-WindowsOptionalFeature -Online -FeatureName Microsoft-Hyper-V -AllAfter installation is completed, reboot the system.
Note:- You should enable virtualization on BIOS before executing the command.
Enable Hyper-V using with CMD prompt & DISM
The Deployment Image Servicing and Management tool (DISM) enables Windows features while the OS runs.
- Open Windows CMD prompt as Administrator.
- Execute the following command
DISM /Online /Enable-Feature /All /FeatureName:Microsoft-Hyper-VOpen Hyper-V Manager
Once you have successfully installed Hyper-V on your system, you should reboot and then check the Windows Administrator Tools folder by clicking ‘Start’ there, and you will find the Hyper-V manager.
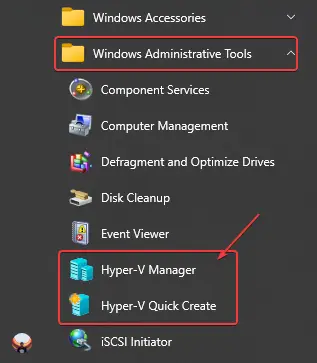
You can now create multiple Virtual Machines and run them simultaneously, without affecting your primary WIndows operating system.
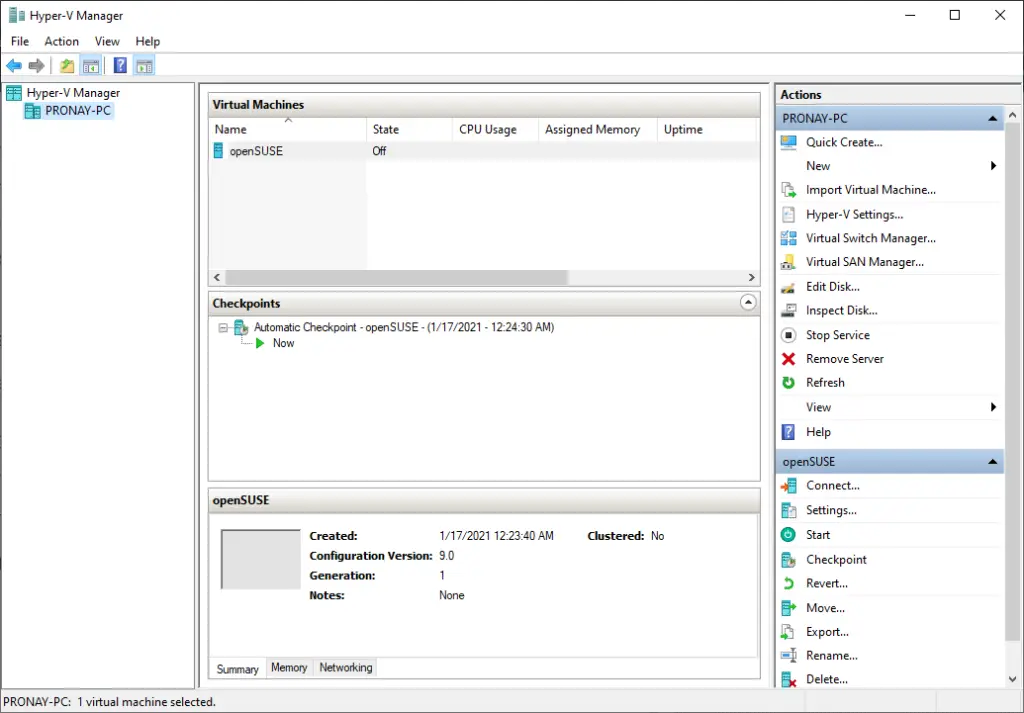
Want to install Ubuntu on Hyper-V? Check out the step-by-step tutorial.
FAQs About Enabling VT on Windows
How to Enable Intel VT-x in Your Computer’s BIOS or UEFI Firmware?
Most recent PCs and Laptop comes with hardware virtualization features. In case if you have an older Intel CPU-based computer, you should check out the BIOS setting. Entering the BIOS setting, reboot your PC, and while on the black screen, you should press ‘Esc,’ ‘F1’, ‘F2’, ‘F9’, ‘F10’, ‘F12’, or ‘DEL’ key (one of the key).
What do I do if my laptop is not capable of Virtualization?
In case if your PC or Laptop does not support Virtualization, then you can install VirtualBox. It’s open-source and supports x86 and x64 bit operating systems.
How do I enable virtualization without UEFI?
Most of the recent PCs come with UEFI boot, and Windows 10 comes with a UEFI bootable system. Earlier Windows 10 or Windows 8 operating systems, PCs come with legacy BIOS systems. If that time your system was supported Intel vt-x, then you should use one of those keys ‘Esc,’ ‘F1’, ‘F2’, ‘F9’, ‘F10’, ‘F12’, or ‘DEL’ to enter the BIOS settings and then enable Intel vt-x.
How to enable or disable Hardware Virtualization in Windows 10?
Open the BIOS setting, and you will see the Virtualization option, and if it is enabled, you can disable using the keyboard’s left and right arrow keys.
How to view the status of hardware virtualization?
Open Windows Task Manager and click on CPU under the performance section then you can see the status of hardware virtualization.
What are the 3 types of virtualization?
1. Server virtualization, 2. Virtual Desktop Infrastructure (VDI), and 3. Application virtualization.
There are other types of virtualization available, like Network and Storage virtualization.
Is it safe to enable virtualization?
It depends on your CPU, but if you want to install another operating system or want to test some specific application while using your primary os, you need virtualization. In virtualization, your CPU will emulate an isolated environment for a specific application or operating system.
Conclusion
If you want to enable Hyper-v on your Windows computer, you can adopt the above method. But keep in mind that your computer needs to support hardware virtualization. We have also given the above method by checking.
If your computer hardware does not support virtualization, you can use open-source software such as VirtualBox.