Recently PHP released the latest stable version, PHP 8.1.6 (PHP 8.1). In this tutorial, we are going to show you the steps to upgrade to the latest version of PHP from the older version PHP 8.0. PHP is a very popular language and over the internet, almost 40%+ are WordPress websites, based on PHP language.
WordPress recommends upgrading to the latest version for security reasons. However, this version doesn’t have any major changes, and if you don’t upgrade to PHP 8.1 then it is okay.
Manual Installation/Upgradation PHP 8.1 on Linux Server
This method will be for Dedicated servers and Desktops that are based on Linux operating system (Ubuntu or Debian-based distros). You can use the same commands for all Linux distros, which are based on Debian or Ubuntu in a few steps.
Must Read: How to Upgrade PHP 8.0 from PHP 7.4 [cPanel or VPS Server]
Step – 1. Update Your System
Use the following command to update your system dependencies and repositories, so you can install the latest stable version of PHP.
sudo apt updateStep – 2. Add Latest PHP 8.1 Package Dependency
After updating system dependencies using the command mentioned above, and now you must run the following commands to update your server with the latest PHP dependency.
You must know which Linux distro you are using as a server. Nowadays most dedicated VPS server provides Ubuntu or Debian-based server so, check your system and use the following command accordingly.
For Ubuntu 22.04, 21.04, 20.04, 18.04:
sudo apt updatesudo apt install lsb-release ca-certificates apt-transport-https software-properties-common -ysudo add-apt-repository ppa:ondrej/phpFor Debian 11, 10, 9:
sudo apt install -y gnupg2 ca-certificates apt-transport-https software-properties-commonNow we need to add a keyring file in trusted.gpg.d directory which is required to add the latest PHP repository in Debian systems.
cd /etc/apt/trusted.gpg.dsudo wget https://packages.sury.org/php/apt.gpgAfter adding apt.gpg keyring file, you check it using ls -l command, and after that, we need to add the PHP source list in Debian Linux.
echo "deb https://packages.sury.org/php/ buster main" | sudo tee /etc/apt/sources.list.d/php.listsudo apt updateMust Read: Upgrade PHP 8.2 from PHP 8.1.x or Older Version
Step – 3. Install PHP 8.1
After updating the latest PHP dependencies and repositories, use the following command to install PHP 8.1 on the server.
sudo apt install php8.1sudo apt install php8.1-common php8.1-cli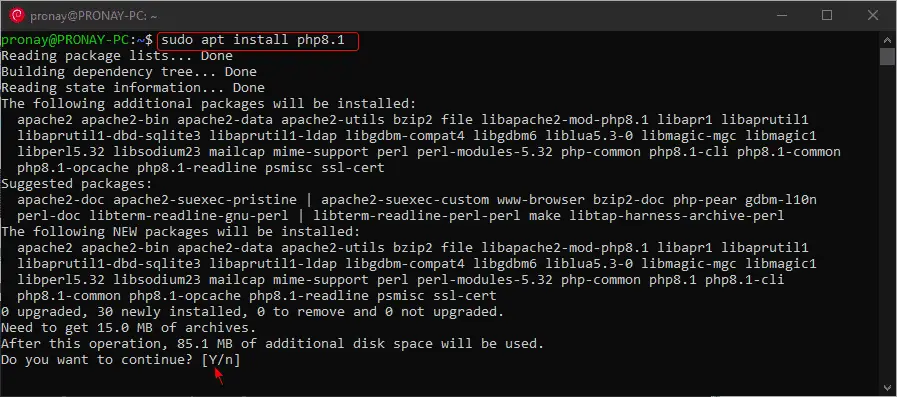
After using the following command you will see a prompt like this, and you have to type “Y” and then hit enter on the keyboard to install the PHP.
Step – 4. Check the Installed Version of PHP
After the completion of the installation of the latest PHP 8.1, you can check whether it was successfully installed or not.
Use the following command to check:
sudo php -v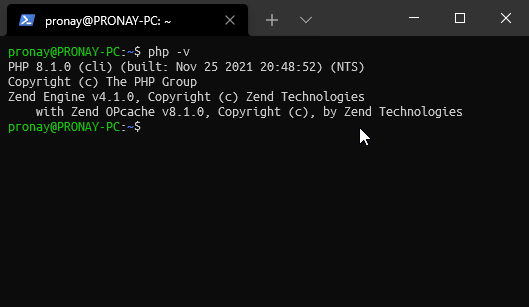
Install Latest PHP 8.1 Modules/Extensions
Modules are very important for doing work with PHP, and different kinds of work will be handled by different-different PHP modules.
In WordPress, you will need various PHP modules like php-mysql, php-imagick, needs for connecting with the MySQL database and handling the images on site respectively.
Installing the latest version of PHP modules or extensions uses the following commands:
sudo apt install php8.1-{imagick,bz2,curl,intl,mysql,readline,xml,fpm,mbstring,zip,bcmath,redis, gd}How to Switch from Older PHP to Latest PHP 8.1 on Apache
Possibly you are upgrading PHP on your server, and that means your server has a web server. Mostly in this case Apache web server will be installed, so we have to disable the older version of PHP and then need to enable the latest PHP 8.1.
For that you have to follow these commands:
Disable the Old PHP
In case, your system has installed PHP 7.4 or lower version and you want to upgrade to the latest version, then replace php8.0 to your current version of PHP.
sudo a2dismod php8.0Enable the Latest PHP
Now use the following command to enable the latest version of PHP using the following command:
sudo a2enmod php8.1Note:- If you are installing PHP in your newly deplyoed system, then you don't need to switch between the PHP versions.
Check Any Syntax Error with Apache
sudo apache2ctl -t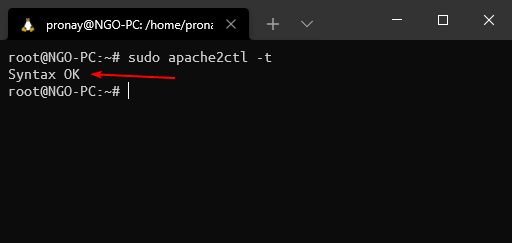
Restart the Apache Webserver
Now, use the following command to restart or reload the Apache webserver so everything works fines without any conflicts.
sudo systemctl restart apache2.serviceHow to Switch from Older PHP to Latest PHP 8.1 on Nginx
Nowadays, most developers choose Nginx instead of Apache, because of the performance and reverse proxy.
Cloud platforms like DigitalOcean, Linode, and Vultr, where you can deploy Nginx-based LEMP droplet or application with one click.
Alternatively, if you want to upgrade the installed PHP package to the latest version, and want to switch between the PHP version – then you must perform the following steps:
Note: To install latest php 8.1 - use the following commands.
Configure Latest PHP with Nginx
As in the Apache web server, you have to execute commands to enable or disable PHP to switch between different versions of PHP.
However, in Nginx, you don’t need that, simply install the latest PHP package as explained above, then simply edit the PHP-FPM socket path in Nginx Server Block (Virtual Host).
Execute the following command to edit the Server Block, which is located in /etc/nginx/sites-available/ directory:
sudo nano /etc/nginx/sites-available/defaultNote: If the system is configured with custom "Server Block" instead of the default one, you must edit the custom one.
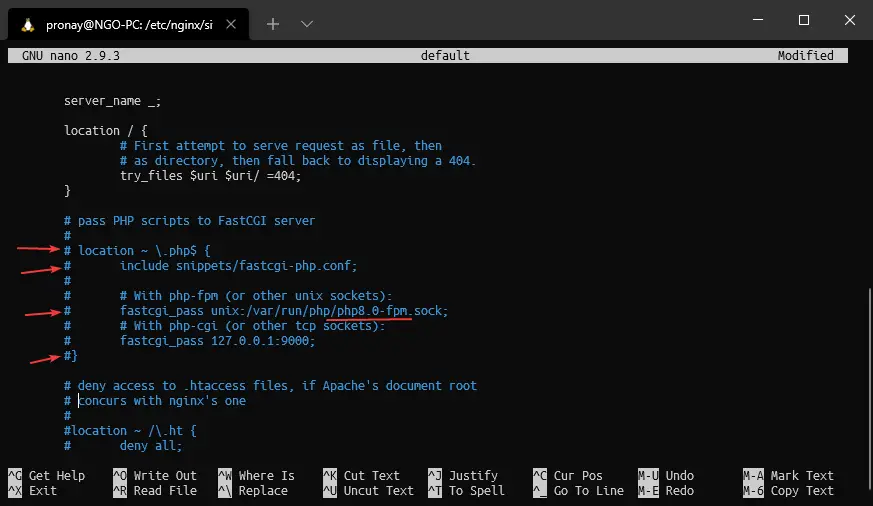
As marked in the image above, you must comment out (Remove the pound/hash [#] sign) and edit the PHP-FPM path, which by default would be php7.4-fpm you must replace it with the latest PHP version number, like php8.1-fpm.
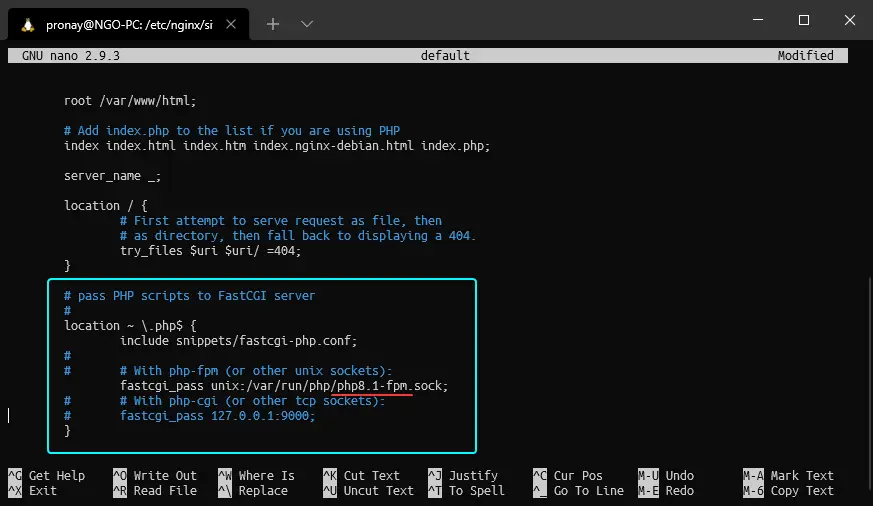
Now to save the modification, type the following keyboard key combination, CTRL+X then type Y and hit Enter key.
Check Any Syntax Error with Nginx
sudo nginx -t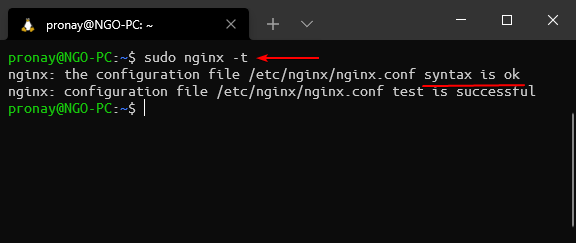
Restart Nginx Web Server
Restart the Nginx web server to make effective changes on the backend and perform well on the front end. You can use the following command to do that.
sudo service nginx restartGetting 502 Bad Gateway Error After Configuring Nginx with Latest PHP
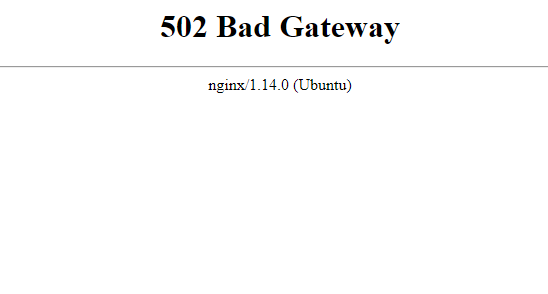
After configuring the latest php-fpm path with the Nginx server block, getting 502 bad gateway errors.
There could be two known issues, first, the latest php-fpm is not installed in the system, and second if it is installed but not running. To fix the issue execute the following commands:
Install Latest PHP-FPM:
sudo apt install php8.1-fpmStart PHP-FPM Service:
sudo service php8.1-fpm startProbably using this method you can switch between different PHP versions and if you get a possible error, also can fix them easily.
Summary
If you are a PHP developer, then this latest update would be interesting for you, check out the latest features on PHP’s official website.
If you are a WordPress website owner, then no need to upgrade, you can wait for the major update, and if you are still using an outdated version then I suggest you upgrade.