Flarum is a free, open-source, and next-generation forum application that helps you to build your discussion forum.
It is an alternative to Discourse and very similar interface to it. Flarum required fewer server specifications compared to the Discourse.
Flarum is written in PHP, simple, fast, and easy to deploy. It provides a flexible architecture, powerful extension support, and all the features you need to run a successful community.
Flarum looks and feels great out of the box. The user interface is streamlined, so you can spend less time clicking and more time talking.
Prerequisites
- Apache or Nginx webserver
- PHP 7+.
- MySQL or MariaDB
- PHP Composer on VPS
- A domain name
Note: - You can use a $5 VPS server from Vultr, Digital Ocean, or Linode to install Flarum. You can also use shared hosting which is based on cPanel (Recommended ChemiCloud).
Install and Configure LAMP Stack for Flarum
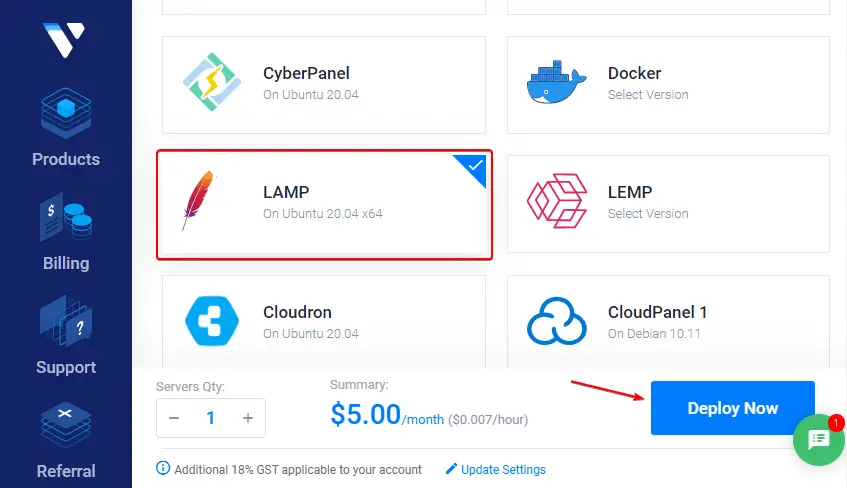
The LAMP Stack stands for Linux, Apache, MySQL, and PHP. So, installing the LAMP stack on VPS is very easy, particularly, if you are using a Cloud platform. I recommend using Vultr, if you sign up using our link you will get $100 credit to deploy the server.
As you can see from the image above, using Vultr Marketplace Apps you can deploy a LAMP Stack on Ubuntu 20.04 server with a single click.
But, you can also install LAMP Stack (Apache, MySQL, and PHP): all the applications one by one by using the following steps.
Note: - To install these applications, you must have a fresh deployed server (Ubuntu/Debian). Then connect to the system console using SSH. You must also allow the UFW firewall for port 80.
Step – 1. Update and Upgrade the System
Using the following command, you must update the system dependencies. So, the following package installation happens without error.
sudo apt update && apt upgrade -yStep – 2. Install Apache HTTP Webserver
sudo apt install apache2Executing the following command, you can install the Apache HTTP server. To check if it’s working or not. Type your IP address on a web browser. If it shows the Apache index page, then it’s working.
Or you can also execute the Apache status command to check whether it’s working.
sudo service apache2 statusStep – 3. Install and Secure Database
To install Flarum on VPS, it’s required to have MySQL 5.6+/8.0.23+ or MariaDB 10.0.5+. So, using the following command you can install the database. For this tutorial, I will install MariaDB (It is forked of MySQL).
sudo apt install mariadb-serverMust Read: - Check out how to install the latest MySQL Database on Ubuntu Server?
Step – 4. Install PHP with Required Modules
Execute the following command to install PHP with all the required PHP modules, which are necessary to run Flarum Forum.
sudo apt install php-commonFlarum required the following necessary PHP extensions (curl, dom, fileinfo, gd, json, mbstring, openssl, pdo_mysql, tokenizer, zip), as above mentioned the command, using that you can install the stable PHP with common extensions. However, you must cross-check whether any extensions are missing or not. If yes, then install it one by one.
Note: - As I showed an image of LAMP and describe it if you deploy the LAMP stack on Vultr or Digital Ocean. Then you don’t need to perform these four steps of manual LAMP installation.
Install PHP Composer
Composer is a package manager, which is an application-level, for PHP programing language. Composer is used for managing PHP application dependencies and libraries.
Flarum also uses Composer to manage its libraries and it is required to install. So, use the following command to install PHP Composer on Ubuntu or Debian system.
Step – 1. Install Composer
sudo curl -s https://getcomposer.org/installer | phpStep – 2. Move composer.phar to /usr/local/bin/ directory
sudo mv composer.phar /usr/local/bin/composerStep – 3. Check Composer Installed version
composer -V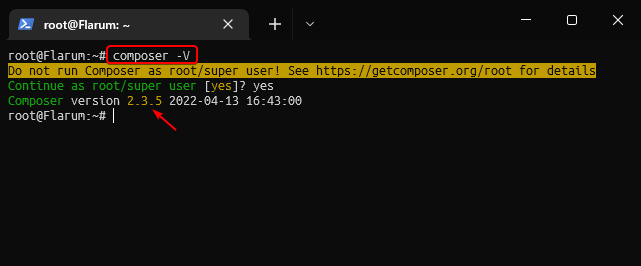
Create MySQL Database and User for Flarum
Above we saw how to install the MySQL database, and how to secure it. But, if you deployed a LAMP stack on Vultr, it comes pre-installed and pre-configured. So, you need to get the MySQL root password, using the following command.
cat /root/.my.cnf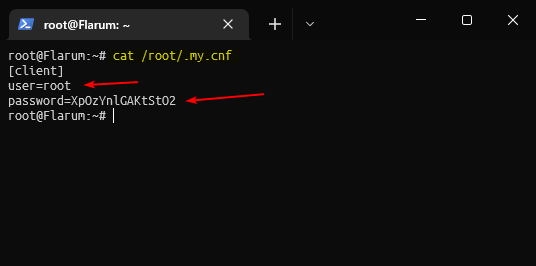
Step – 1. Login To MySQL/MariaDB
sudo mysql -u root -pMySQL will prompt you to enter the password. Type the password, it will show blank but don’t worry. After entering the complete password hit Enter key on the keyboard.
Note: - If you deployed LAMP stack then simply check the documentation, or if you are a Vultr Cloud user then use the method as mentioned above.
Step – 2. Create Database
Replace flarum with your preferred database name.
CREATE DATABASE flarum;Step – 3. Create User
Replace flarum_user to your preferred database username and flarum_password to your preferred strong password. You can use the password generator tool.
CREATE USER 'flarum_user'@'localhost' IDENTIFIED BY 'flarum_password';Step – 4. Give User Privileges
GRANT ALL PRIVILEGES ON flarum.* TO 'flarum_user'@'localhost';Step – 5. Flush Privileges and Exit
FLUSH PRIVILEGES;exitCreate Flarum Project and Configure
Now, we are going to learn how to install Flarum on a cloud server. Use the following steps of commands to install Flarum:
Step – 1. Create Flarum Root Directory
sudo mkdir /var/www/html/flarumStep – 2. Change Directory on Terminal
cd /var/www/html/flarumStep – 3. Create Flarum Project and Install
sudo composer create-project flarum/flarum .If you want to test the beta version of Flarum then must execute the following command:
sudo composer create-project flarum/flarum . --stability=betaStep – 4. Install Flarum
sudo composer installStep – 5. Change the Flarum Directory Ownership
sudo chown -R www-data:www-data /var/www/html/flarum/Step – 6. Give Proper Read & Write Permission to Flarum Directory
sudo chmod -R 755 /var/www/html/flarum/Configure Virtual Host
Apache Virtual hosts are necessary to handle multiple websites on a single server. So, using the following steps you can create Apache virtual host config file for Flarum.
Step – 1. Create Apache virtual host config file
sudo nano /etc/apache2/sites-available/flarum.confStep – 2. Paste the following code
You must replace the example.com domain name with your actual domain name to work the virtual host file. In case you don’t want to add your domain name then remove the two lines ServerName and ServerAlias.
<VirtualHost *:80>
    ServerName example.com
    ServerAlias www.example.com
    DocumentRoot /var/www/html/flarum/public
    <Directory /var/www/html/flarum/public/>
        Require all granted
        Options Indexes FollowSymLinks
        AllowOverride All
        Order allow,deny
        Allow from all
    </Directory>
   ErrorLog ${APACHE_LOG_DIR}/error.log
   CustomLog ${APACHE_LOG_DIR}/access.log combined
</VirtualHost>
Step – 3. Enable Apache rewrite module
sudo a2enmod rewriteStep – 4. Enable Flarum Virtual host
sudo a2ensite flarum.confStep – 5. Restart Apache HTTP Service
sudo service apache2 restartConfigure DNS for Flarum
DNS configuration is not necessary for the Cloud server, you can use the public IP address to visit your deployed project. However, my suggestion will be to use a domain name for proper configuration for your Flarum production or development project.
So, can using the following steps, easily can configure the DNS.
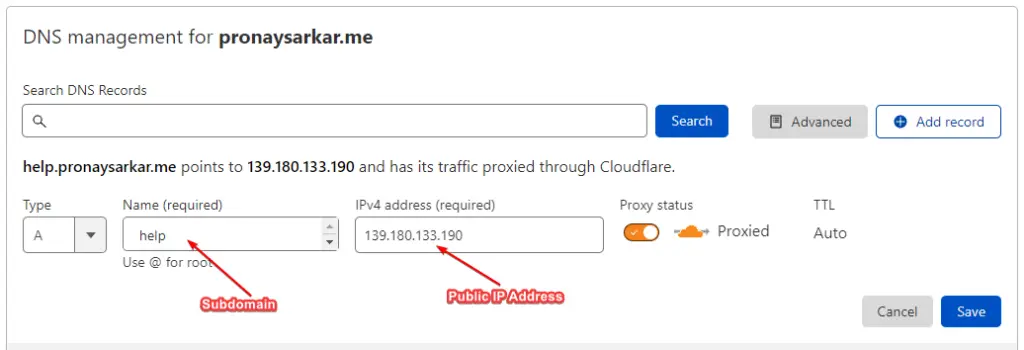
Step – 1. Copy Server’s Public IP Address

Step – 2. Paste it to DNS Management
Want to point Flarum in a subdomain instead of a root domain, then simply add the subdomain name and then point it out with public IP address.
Fishing the Flarum Installation
Almost everything is done, just need to give a finishing touch (configuration) by filling out some basic information and the important credentials like Database password and Admin password, etc.
So, for that navigate to your domain name using any web browser and finish the Flarum installation.
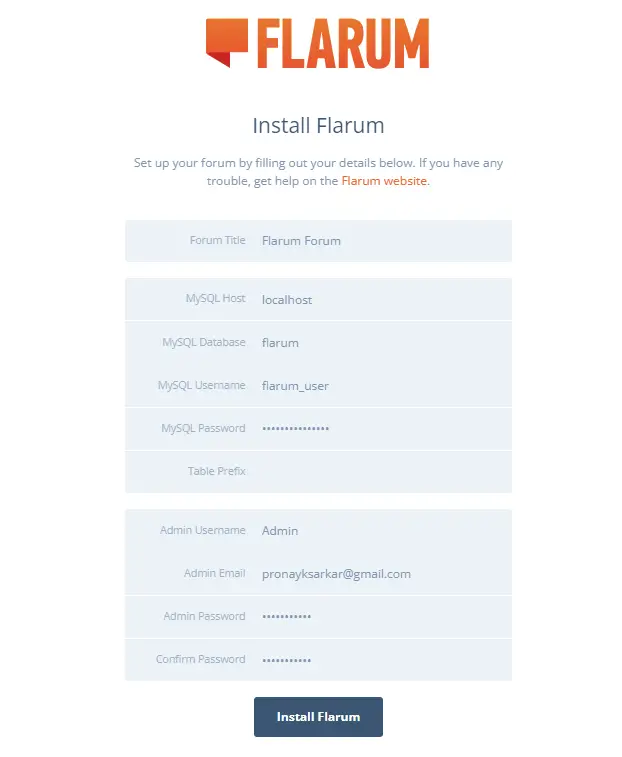
Once you have filled out all the required information, then hit on the installation button. And the Flarum Forum would be installed on the server.