In this article, we will talk about installing OpenLiteSpeed on the Ubuntu Linux system. And the steps by step solution that you need to follow.
You will get a brief introduction to OpenLiteSpeed, some of its features, and benefits. OpenLiteSpeed is a web server, primarily used for deploying PHP applications like WordPress, Ghost, and other CMS and applications.
If you are a web developer, then you must know how to install different web servers on any Linux system. So keep up with this tutorial.
Table of Contents
What is OpenLiteSpeed (OLS)?
OpenLiteSpeed is the Open-Source edition of LiteSpeed Web Server, which is proprietary web server software. OpenLiteSpeed/LiteSpeed is the 4th most popular web server, estimated to be used by 10% of websites as of 2021. The software uses mostly the same configuration as Apache HTTP Server and is compatible with it without slowing down.
What are the Minimum System Requirements to Install OpenLiteSpeed?
To install OpenLiteSpeed on your system, then it needed to be met the minimum requirements. However, you can use an underpowered system like Intel 80486 and up. For the operating system, you can use RHEL-based distributions or Debian and Ubuntu Linux. Here are complete details about the system requirements which is required to install OpenLiteSpeed.
| Operating System | RHEL-based distributions or Debian and Ubuntu |
| CPU | Intel 80486 and up, PowerPC G4, and ARM CPU* |
| Memory | 32 MB and more. |
| Storage | 500 MB and more (as per project requirement) |
There are other pre-requisites (not required, but you can set up after installing OpenLiteSpeed), including initial server configuration, firewall setup, and others as mentioned in the list:
- A domain name
- SSL certificate
- MariaDB/MySQL Database
- PHP
- Opened Firewall ports 80, 443, etc.
How to Install OpenLiteSpeed on Ubuntu?
Step#1
Update System & Add LiteSpeed Repository
In case you are using a fresh/untouched Linux system, then update it first and then add the OpenLiteSpeed files repository to the apt package manager. For that, you must connect to the system using an SSH connection and execute the following commands.
sudo apt updatesudo wget -O - http://rpms.litespeedtech.com/debian/enable_lst_debian_repo.sh | sudo bashThe wget command fetches the remote repository located on the LiteSpeed server as mentioned in the link and is added to the apt package manager.
Step#2
Install OLS Package and Check the service status
After adding the LiteSpeed repository, you can update the system or can go with the installing part by executing the following command:
sudo apt install openlitespeedThis installation process will prompt you to proceed or not so, type Y and click enter to install. Once the installation is completed, verify whether the OpenLiteSpeed is running or not by checking the service. So, execute the following command.
sudo systemctl status lswsYou will receive the following output:
ubuntu@olitespeed:~$ sudo systemctl status lsws
● lshttpd.service - OpenLiteSpeed HTTP Server
     Loaded: loaded (/etc/systemd/system/lshttpd.service; enabled; vendor preset: enabled)
     Active: active (running) since Sat 2022-10-29 20:04:40 UTC; 1min 4s ago
    Process: 5976 ExecStart=/usr/local/lsws/bin/lswsctrl start (code=exited, status=0/SUCCESS)
   Main PID: 6003 (litespeed)
     CGroup: /system.slice/lshttpd.service
             ├─6003 "openlitespeed (lshttpd - main)"
             ├─6014 "openlitespeed (lscgid)"
             ├─6043 "openlitespeed (lshttpd - #01)"
             └─6044 "openlitespeed (lshttpd - #02)"

Oct 29 20:04:38 olitespeed systemd[1]: Starting OpenLiteSpeed HTTP Server...
Oct 29 20:04:38 olitespeed lswsctrl[5976]: [OK] litespeed: pid=6003.
Oct 29 20:04:40 olitespeed systemd[1]: Started OpenLiteSpeed HTTP Server.
ubuntu@olitespeed:~$
Step#3
Update System Firewall
Updating the firewall is important when we want to derive egress (outbound) and ingress (inbound) traffic on a particular project. For example, in this OpenLiteSpeed server, we will use to host the WordPress website, in that we need to allow ports 80 and 443 for HTTP and HTTPS traffic respectively.
The OpenLiteSpeed web server also comes bundled with a GUI-based admin panel and to access that we need to allow specific ports 7080 and 8088. You need to allow TCP port via UFW firewall on Linux systems (Debian/Ubuntu).
To allow access to the ports, run the following command:
sudo ufw allow 7080,80,443,8088/tcpNow, check the status of the firewall rules:
sudo ufw statusOutput:
ubuntu@olitespeed:~$ sudo ufw status
Status: active

To                         Action      From
--                         ------      ----
22                         ALLOW       Anywhere
80,443,7080,8088/tcp       ALLOW       Anywhere
22 (v6)                    ALLOW       Anywhere (v6)
80,443,7080,8088/tcp (v6)  ALLOW       Anywhere (v6)

ubuntu@olitespeed:~$
In case, you are using cloud services from these providers, like AWS, Azure, Alibaba Cloud, GCP, Oracle, or IBM Cloud then you must create custom security rules or need to add specific ports or port ranges to provide access.
Check out the complete detailed article about, how to set up firewall rules/security group policies for compute instances for different cloud providers.
Step#4
Check Installation and Access Admin Panel
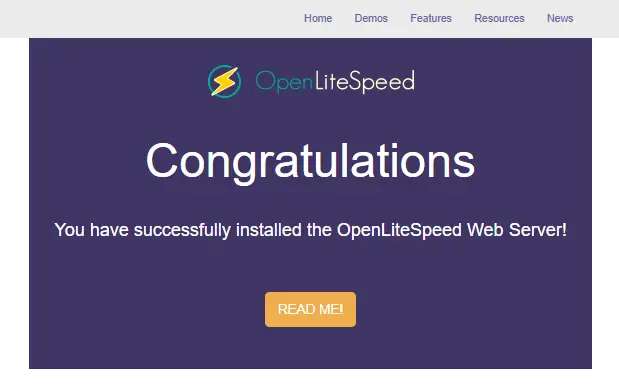
After installing and allowing the port or adding the security group rules on the system panel, you can visit the following URL to check the OLS installation. If the page shows congratulations as shown in the image, that means everything is fine.
http://server_ip:8088
Access OpenLiteSpeed Admin Panel:
http://server_ip:7080
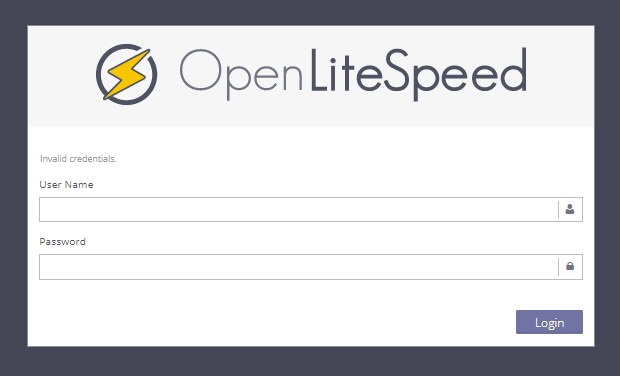
Visiting the following address, you can access the GUI-based admin panel and configure the Openlitespeed server accordingly. However, the first time you must execute the command to generate the LiteSpeed admin console password. (Checkout configuration part)
How to install PHP and Database for OpenLiteSpeed?
To work with the OLS server, your system must have at least the required applications like PHP and MySQL or MariaDB Database. These two must have to deploy WordPress and other PHP-based CMS. So, follow the steps to install the latest PHP and required database for OpenLiteSpeed.
Install Latest PHP for the OpenLiteSpeed server
The OpenLiteSpeed web server comes bundled with the specific version of PHP, but not the latest version. So, using the following command you can install the latest and stable PHP for the LiteSpeed web server.
Add LiteSpeed Repository:
sudo wget -O - https://repo.litespeed.sh | sudo bash
PHP 8.0:
sudo apt-get install lsphp80 lsphp80-common lsphp80-mysql lsphp80-imap lsphp80-curl lsphp80-opcache lsphp80-intl lsphp80-redisPHP 8.1:
sudo apt-get install lsphp81 lsphp81-common lsphp81-curl lsphp81-mysql lsphp81-opcache lsphp81-imap lsphp81-redis lsphp81-intlWhen you execute the command, the system will prompt you to proceed further or not. In this case, we want to install it, so type Y and hit enter to proceed.
Install MariaDB Database for OpenLiteSpeed server
The process of installing the database for OpenLiteSpeed is the same as the Apache web server and Nginx web server, cause OLS does not come with the bundled database. So, we need to install it manually.
OpenLiteSpeed support MySQL, MariaDB, and PostgreSQL databases like Apache. For this tutorial and your production, we suggest you, install MariaDB, which is forked from MySQL database.
MariaDB is an open-source application, and it is an improvement upon MySQL. However, MySQL has its pros and cons, but for individual users MariaDB is perfect. So, to install it follow the steps mentioned below:
sudo apt install mariadb-server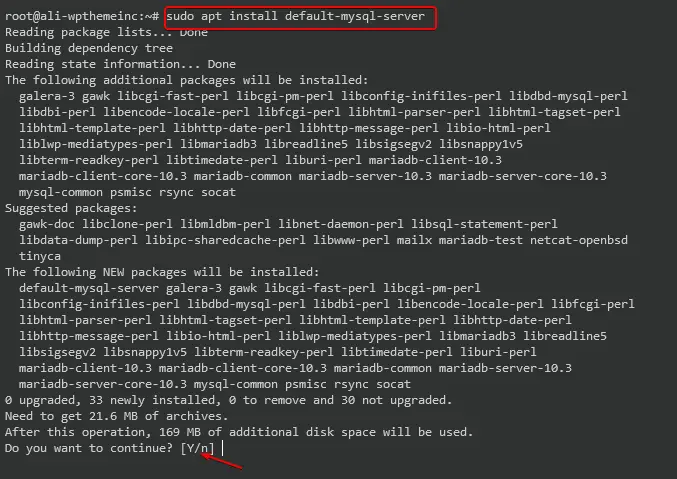
After executing the installation command, the terminal will prompt you to “Do you want to continue?” Type Y and press enter on the keyboard, in a few seconds, the SQL database application will be installed on the system. Using the following command, you can check the status:
sudo service mysql status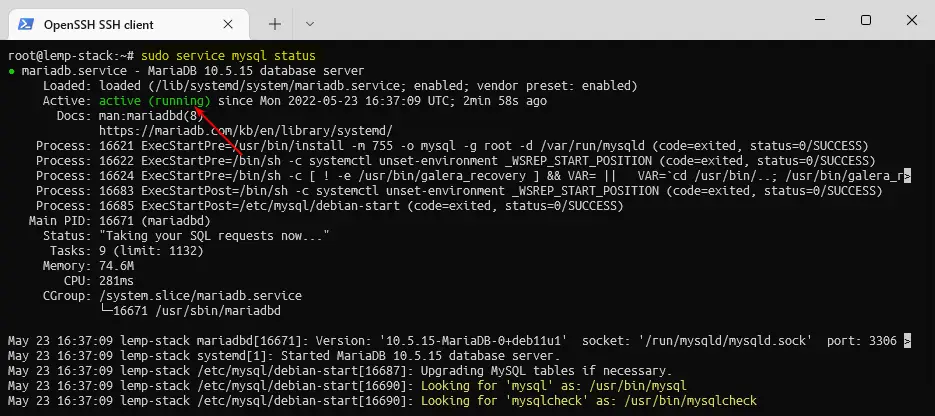
Note: - This installing method will work with those systems that are based on Debian/Ubuntu Linux.
However, this process is still not completed, you must secure the database by setting up the root password and disabling remote access*. Perhaps you can check out a detailed article about MySQL/MariaDB database here.
So, use the following command to secure the database:
sudo mysql_secure_installation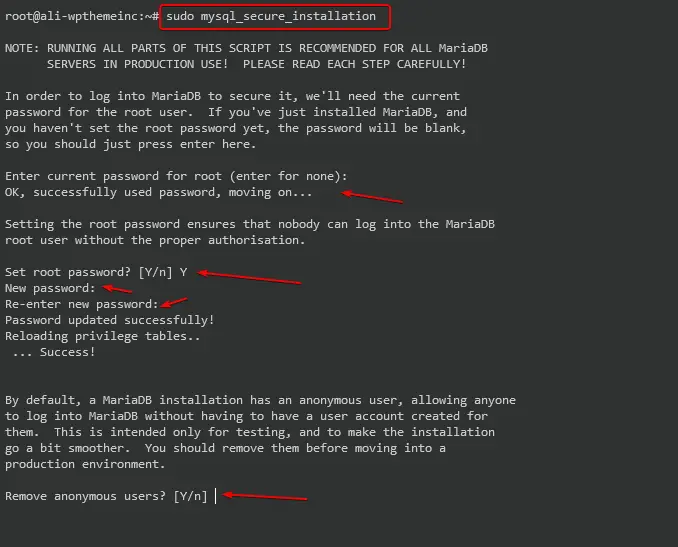
When you execute the command, it will ask you a few questions following with “Enter current password for root (enter for none)” however, the new database will not have any password and we are going to set a new one, so press the enter key on the keyboard. Afterward, other questions will be asked, as I have mentioned in the list with the answers.
- Set root password? [Y/n] Y (You have to enter two times, the same password)
- Remove anonymous users? [Y/n] Y (This feature allows to login anyone without any user account)
- Disallow root login remotely? [Y/n] Y (To disable root logins from remote machines.)
- Remove test database and access to it? [Y/n] Y (MariaDB comes with a database named ‘test’ that anyone can access)
- Reload privilege tables now? [Y/n] Y (Ensure that all changes will take effect immediately)
How to configure the OpenLiteSpeed Web server?
The OpenLiteSpeed web server configuration will depend on your project or what purpose you have. Suppose you want to host WordPress websites, then you must configure them accordingly.
Here I am going to share the base configuration, which you will need to perform, even if you want to host the WordPress or other CMS.
Step#1
Set Username and Password for Admin Console
You must set a new username and password for the OpenLiteSpeed server, whenever you install it for the first time. Without these credentials, you won’t be able to access the server configuration page. So, using the following command you can set up the credentials of LiteSpeed Admin Console.
sudo /usr/local/lsws/admin/misc/admpass.sh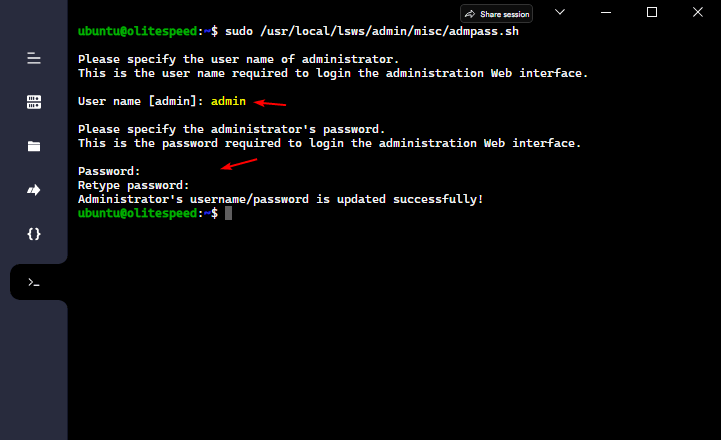
When you execute the command to set a username and password, the system will ask you to set a new username and password as shown in the image above.
Afterward, visit the admin console link to log in to the OpenLiteSpeed configuration page.
http://server_ip:7080
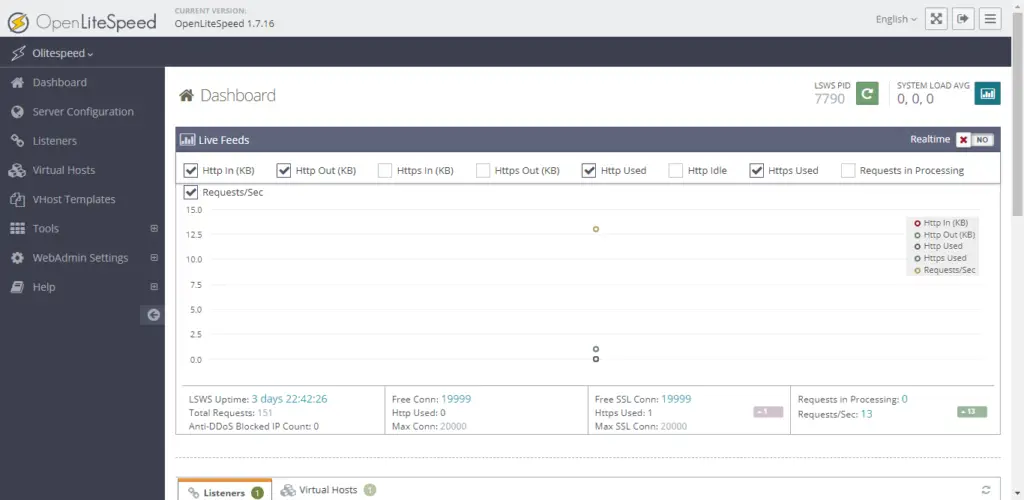
After entering the login credentials, you will open up the admin console dashboard as shown in the image above.
Step#2
Set up the latest PHP for the OpenLiteSpeed Web server
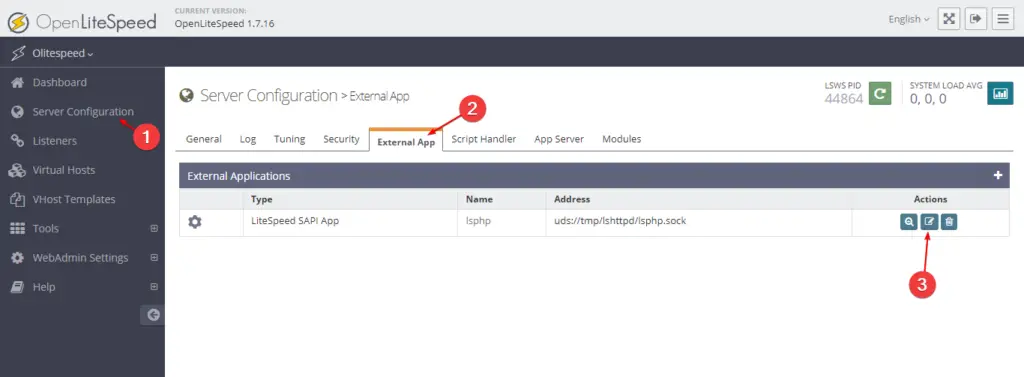
To configure the latest installed php for the OpenLiteSpeed server, you have to navigate to the Server Configuration section then External App, and edit the LiteSpeed SAPI App, as shown in the image.
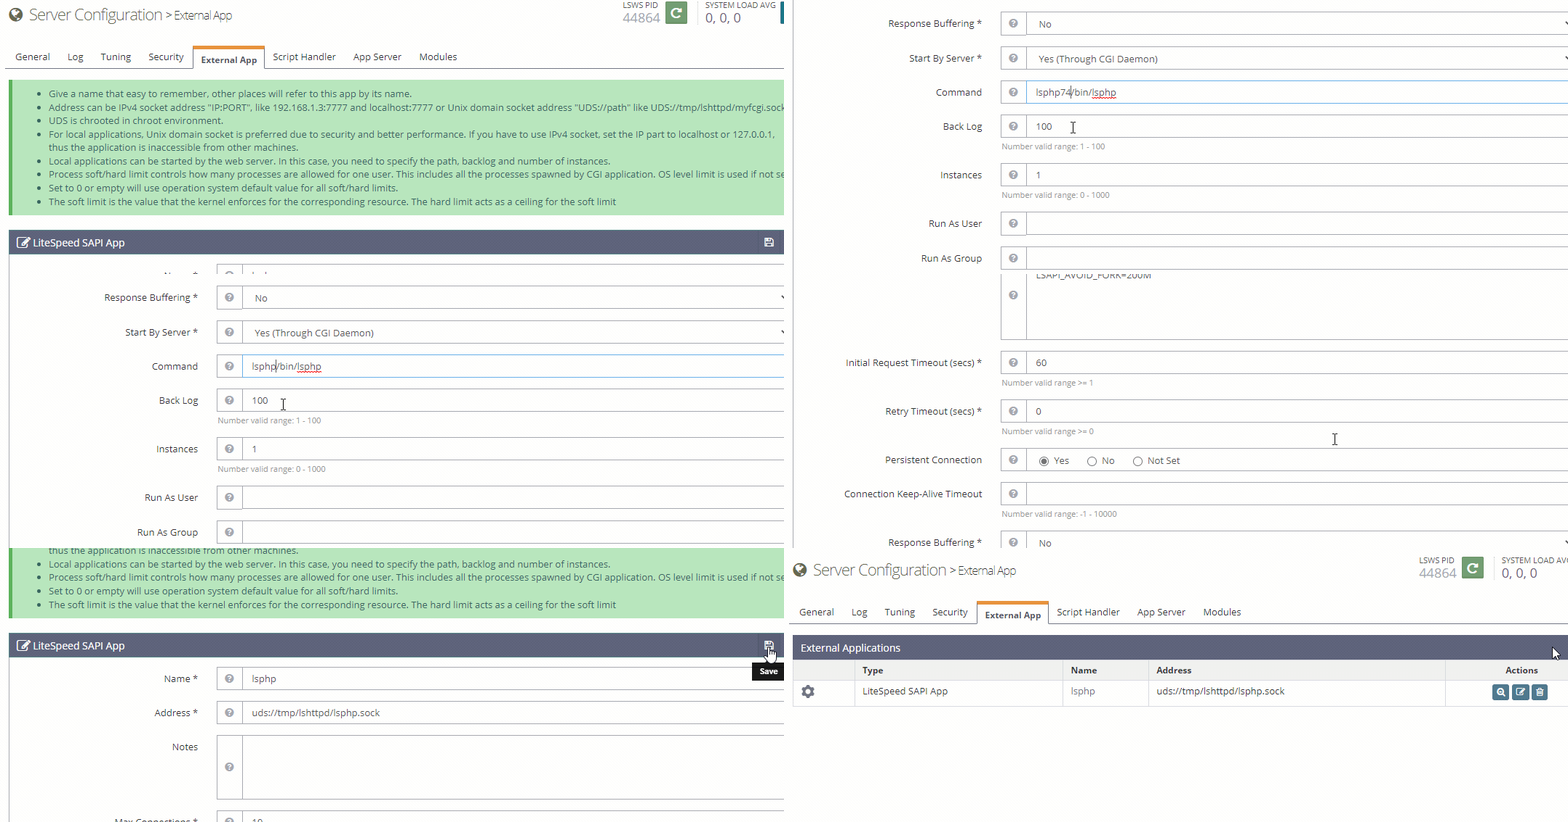
After configuring the latest PHP, please do a graceful restart of the web server and visit the following link to cross-check.
http://your_ip:8088/phpinfo.php
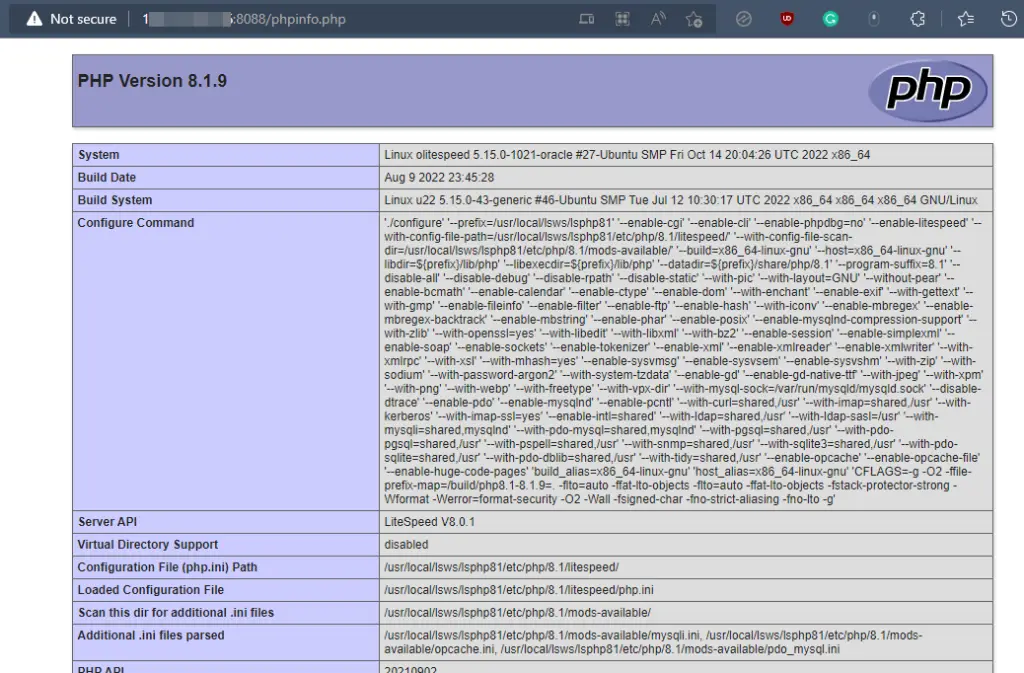
Afterward, you can also configure Virtual Host for websites. But if you have a domain then it would be best then to configure it. However, you can read this detailed article regarding configuring the Virtual Hosts on the LiteSpeed web server.
Benefits of OpenLiteSpeed over Apache & Nginx
The OpenLiteSpeed/LiteSpeed is a modern web server, and it outperformed the most popular Apache and Nginx web server in terms of performance, scalability, and security.
Even the LiteSpeed server supports most of Apache’s modules for easier migration from Apache to LiteSpeed.
Here are some reasons that you should use LiteSpeed over Apache or Nginx:
- Free & Open Source
- Built-in Cache
- Better performance
- HTTP/3 or QUIC protocol support
- Better Security
- Reduces hardware costs
- Easier Migration
LiteSpeed also provides enterprise solutions like Nginx plus and for individuals, you can access it free of cost, with community support. The LiteSpeed tech also provides a control panel named CyberPanel likely cPanel, and Plesk.
FAQs
Are OpenLiteSpeed and LiteSpeed the same?
Yes, under the hood both are the same, and both applications are made by LiteSpeed tech.
Is OpenLiteSpeed better than Nginx?
Yes, in some ways the LiteSpeed server is better than Nginx. Even some big web hosting enterprises are using the modern LiteSpeed Enterprise solutions for providing consumer/business web solutions.
Is OpenLiteSpeed better than Apache?
Definitely, it is far better than Apache in terms of performance and security. The LiteSpeed even supports most apache modules.
Does LiteSpeed use Apache?
LiteSpeed supports most of the Apache HTTP server modules and even .htaccess, and you can use Apache with the LiteSpeed server, simultaneously.
Is OpenLiteSpeed free?
Yes, OpenLiteSpeed is free for individual access. However, for business, you can use the enterprise solution of LiteSpeed tech.
Conclusion
Installing the OpenLiteSpeed web server on the Ubuntu system is very easy as you read this tutorial. The OpenLiteSpeed server is just a single command away and then using this tutorial you can install the latest PHP and configure it with the server. However, to host WordPress websites or other CMS you will need a database like MySQL or MariaDB.