Have you ever wondered how to install WordPress on Oracle Cloud for Free using Always Free Virtual Instance? Oracle Cloud provides Always free services plus a $300 free trial credit for 30-days to use other premium services.
In this tutorial, we will learn, step-by-step methods from deploying Oracle Cloud Instance (OCI) to configuring Virtual Cloud Network (VCN) and then installing WordPress.
Table of Content:
- What benefits you will get with Oracle Cloud
- How To Deploy a Virtual Machine on Oracle Cloud?
- How To Install WordPress on Oracle Cloud
- Step – 1. Connect System using SSH
- Step – 2. Allow HTTP Port Iptables
- Step – 3. Install LAMP Stack
- Step – 4. Create Database
- Step – 5. Create WordPress Directory
- Step – 6. Download WordPress Files & Extract
- Step – 7. Copy Extracted Files
- Step – 8. Give Proper Permission & Ownership
- Step – 9. Configure Apache Virtual Host
- Step – 10. Configure WordPress
- FAQs
- Summary
Benefits of Using Oracle Cloud Free Tier

Oracle Cloud has a lot of advantages. This gives you a free $300 credit for 30 days when you sign up. And after 30 you can always use the free services of Oracle Cloud. In which you get to use the following services for free:
- Two AMD Compute Instance
- Two Oracle Autonomous Databases
- Two-Block Volumes Storage (200 GB)
- 10 GB Object and Archive Storage Each
Must Read: - Check out, How to Install WordPress on Alibaba Cloud Hosting for Free.
How To Deploy a Virtual Machine on Oracle Cloud?
To deploy the Oracle Cloud instances, you must have an account with the verified payment method. When you sign up for a new account will get $300 free credit for 30 days. In this trial period, you will get access to complete services of Oracle Cloud.
However, if you don’t upgrade the account after the trial period, the service access will be limited. But you will still have the ”Always free services” access, including two AMD-based, compute instances.
So, let’s get started with deploying an always-free server to host a WordPress website.
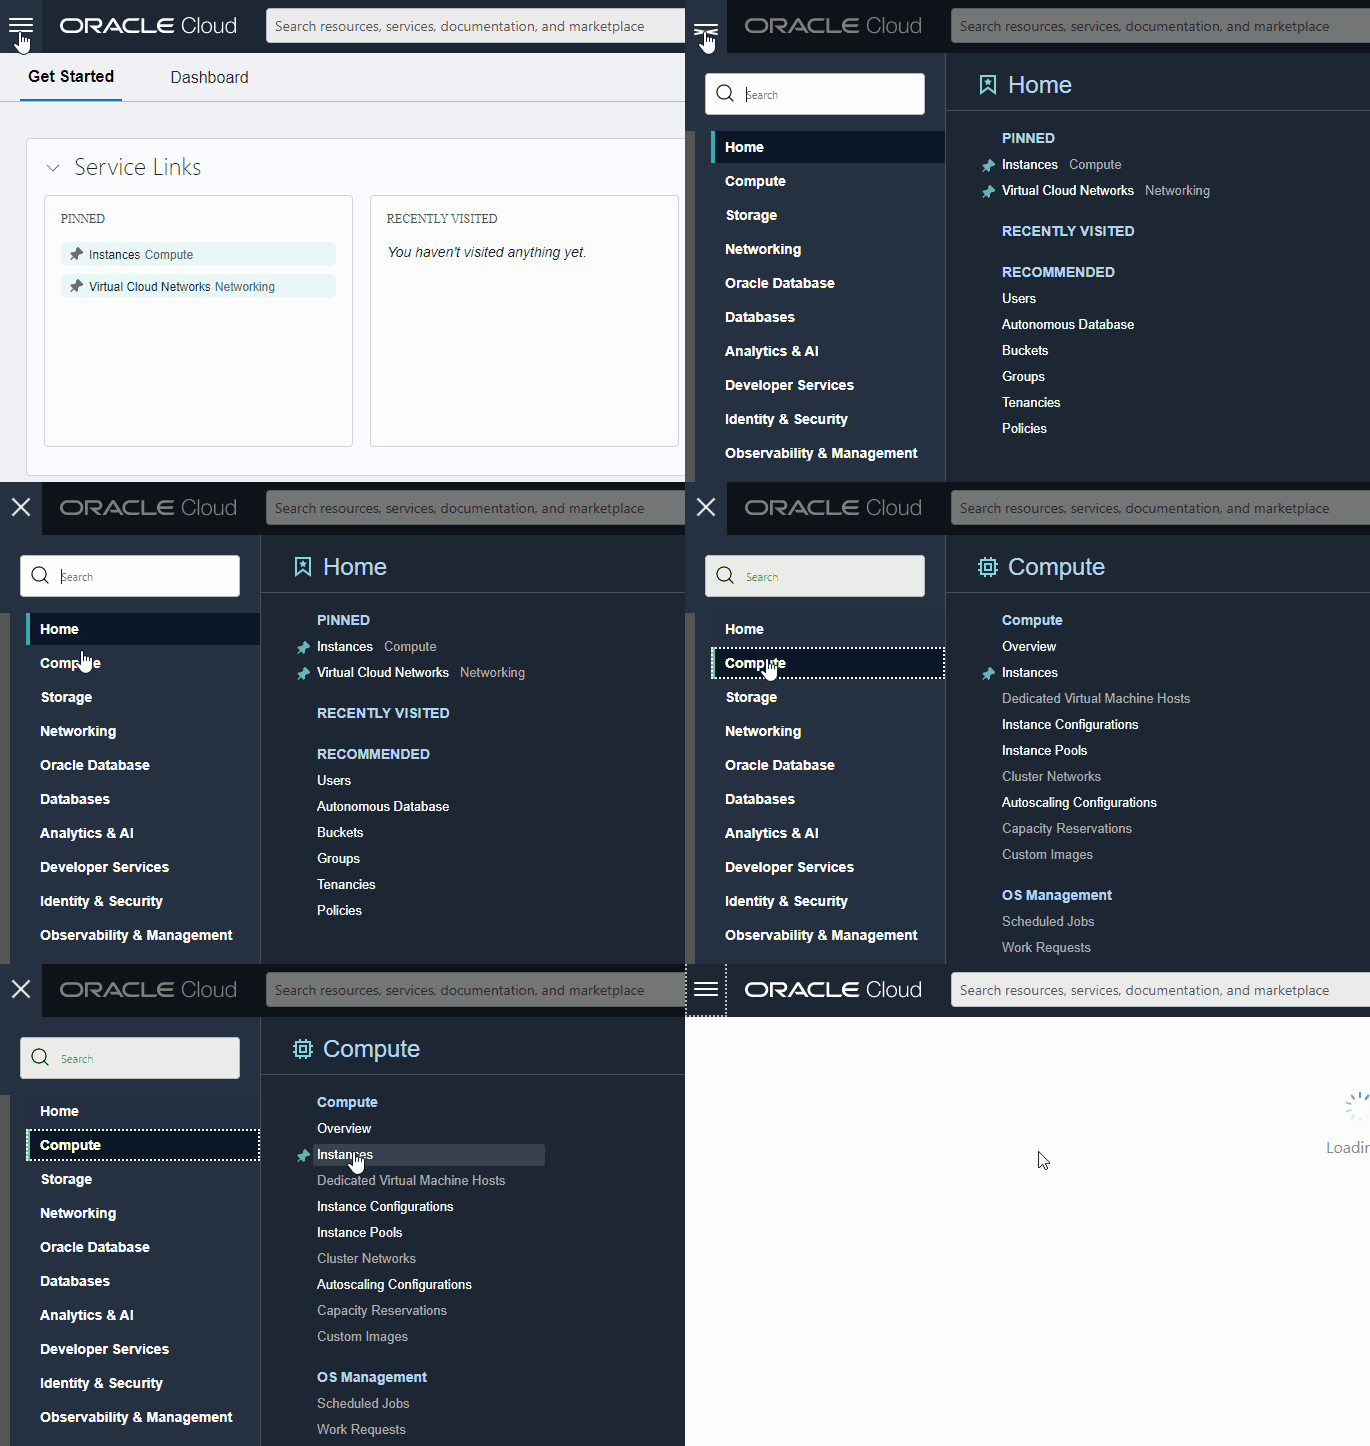
Step – 1. Go Compute Instance Section
First, log in to the Oracle Cloud dashboard, then click on the menu and select compute instances to create a new one.
Step – 2. Click Create Instance Button
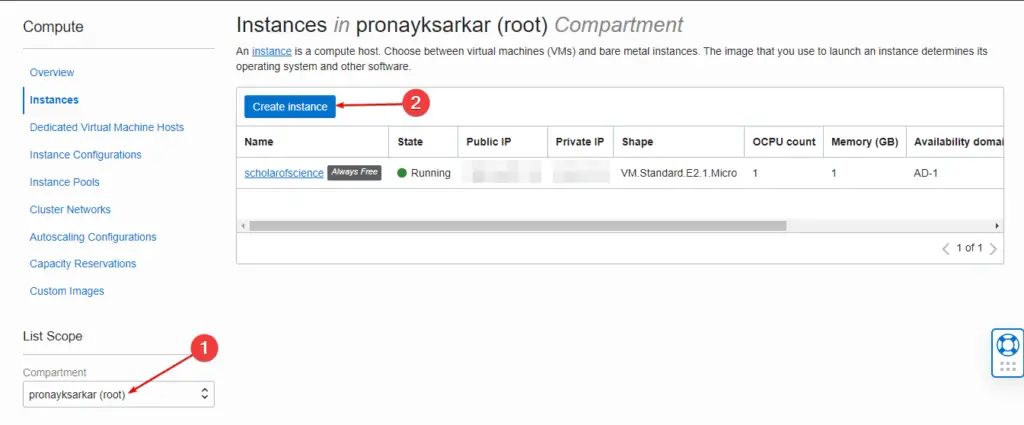
Oracle Cloud gives you to create up to two virtual machines, in the always free tier plan. As shown in the image click on the ‘Create instance’ and then follow the next steps.
Step – 3. Give Instance Name
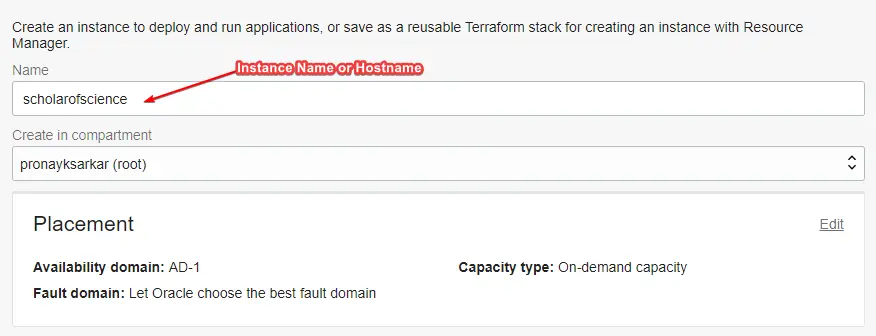
Give the instance name or just leave it as its default, and don’t forget to select the root compartment.
Step – 4. Select OS Image & Shape
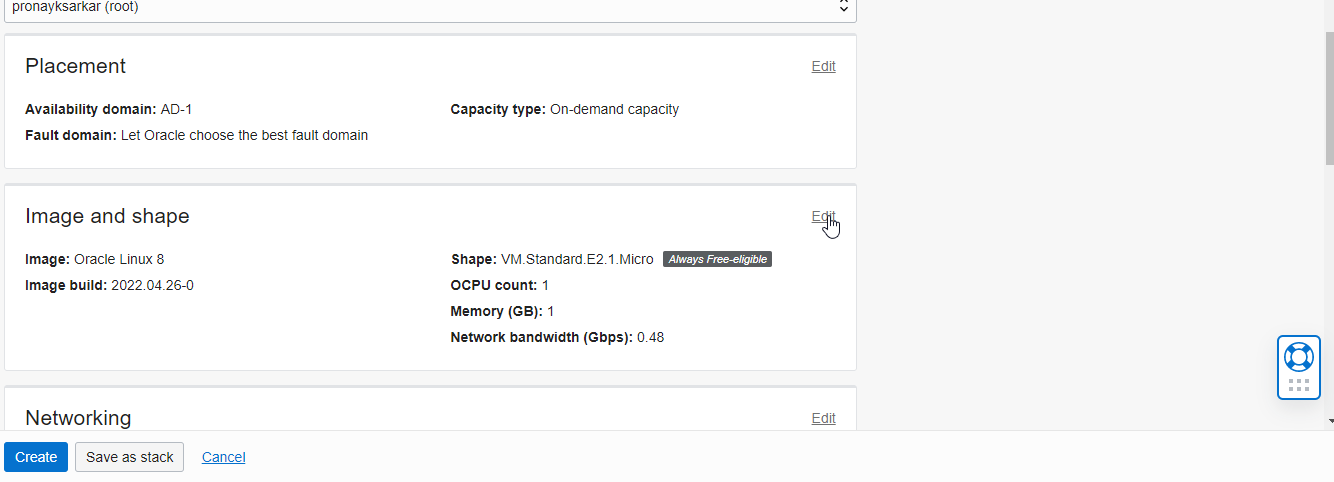
The next step is choosing the operating system, by default Oracle Linux will be selected. It is a great Linux distribution and if you are familiar with CentOS then you can use Oracle Linux to host websites. Perhaps, I suggest you choose Ubuntu operating system as shown in the image above.
Step – 5. Specify Virtual Cloud Network
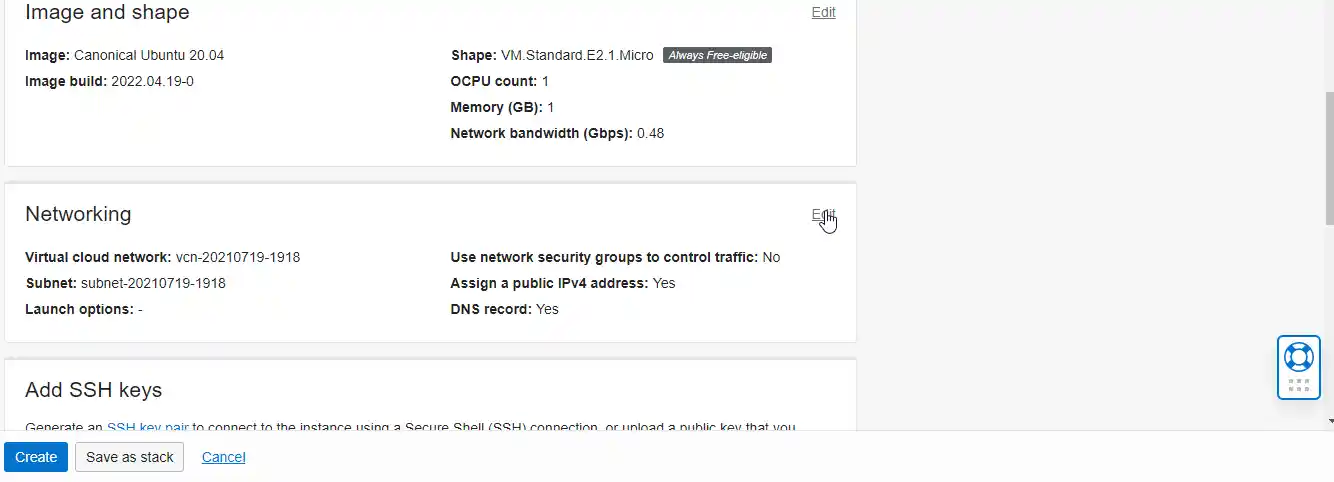
The next step is choosing a virtual cloud network. You can create a new Oracle Cloud Virtual Cloud Network or choose the existing one.
Step – 6. Add or Upload SSH Keys
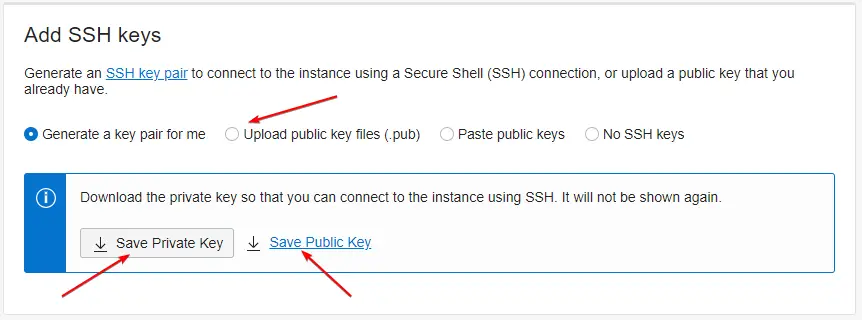
This one is a very important step, to connect your virtual machine you must generate an SSH key or upload a key. In other cloud platforms, like Digitial Ocean and Vultr Cloud, you will get the option to set a password.
Step – 7. Specify Boot Volume
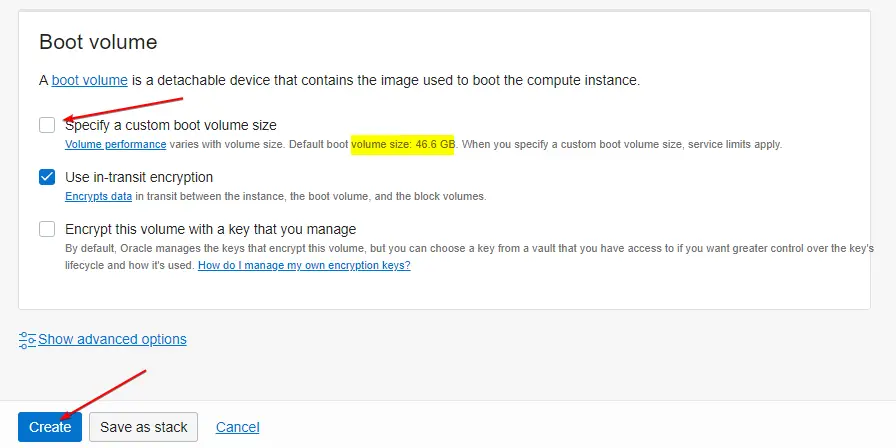
Now, you can specify the boot volume size. Oracle Cloud gives you up to two block volumes up to 200 GB size total.
Step – 8. Deploy Oracle Cloud Instance (OCI)
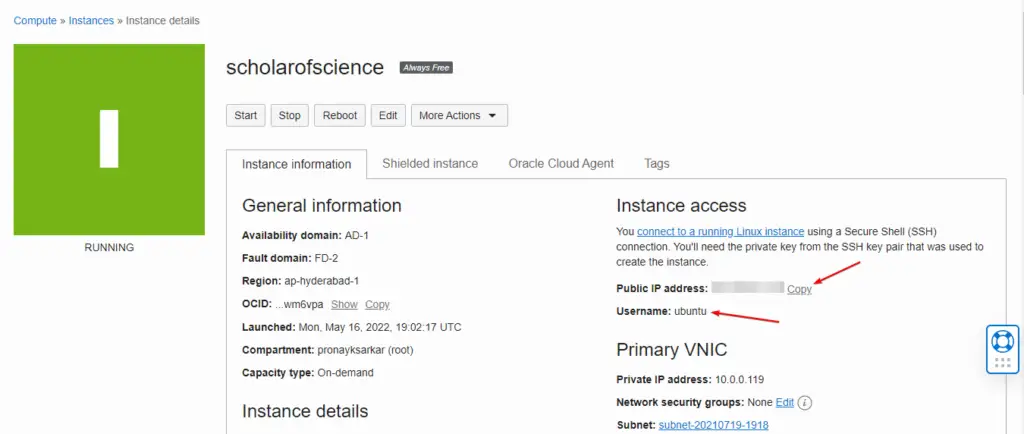
After configuring the settings of the virtual machine, click on create to deploy. After a few seconds, the instance will be up and running.
Please note the public IP address and the system username. It will be required to connect the system and route the domain name for the website.
How To Install WordPress on Oracle Cloud Free Virtual Machine?
After deploying the Oracle Cloud instance, you can create any type of project. In this tutorial, step-by-step I have explained, how to install WordPress.
Step – 1. Connect System using SSH
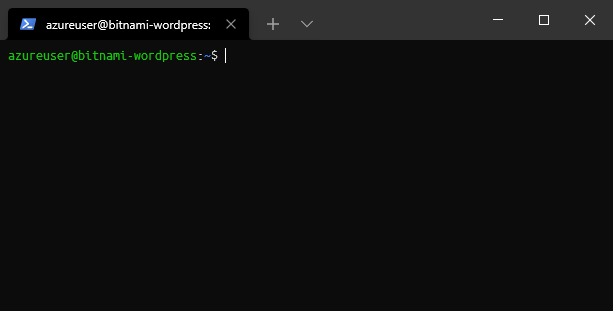
To install WordPress, you must connect to the system using SSH. First, open your PC’s terminal or PowerShell, then use the following command:
ssh -i '.\<private_key_file>' ubuntu@public_ip_addressStep – 2. Allow Web Traffic in Iptables Firewall
sudo iptables -I INPUT 6 -m state --state NEW -p tcp --dport 80 -j ACCEPTsudo iptables -I INPUT 6 -m state --state NEW -p tcp --dport 443 -j ACCEPTsudo netfilter-persistent saveOracle Cloud uses Iptables Netfilter firewall, if you even whitelist the HTTP and HTTPS port on network security group on VCN. So, you must execute both commands to enable web traffics.
Step – 3. Install LAMP Stack
To install a WordPress site on a virtual machine, there are various methods to it. Like you can use LAMP or LEMP Stack for it. These stacks include all necessary applications that are required to install WordPress. The LAMP stands for Linux, Apache, MySQL, and PHP respectively.
To proceed with further steps, please check out how to install the LAMP stack on Ubuntu.
Step – 4. Create Database
First, you must log in to MySQL using the root credentials, which you have already created during the MySQL installation. Use the following command to login MySQL:
sudo mysql -u root -pCreate New Database: Replace wordpress with your preferred database name.
CREATE DATABASE wordpress;Create User and Set Password: Replace wp_user with your preferred database username and password with your preferred strong password.
CREATE USER 'wp_user'@'localhost' IDENTIFIED BY 'password';Grant Privileges:
GRANT ALL PRIVILEGES ON wordpress.* TO 'wp_user'@'localhost';Flush Privileges:
FLUSH PRIVILEGES;exit;Step – 5. Create WordPress Root Directory
Replace wordpress with your preferred directory name. And when you create a new Apache virtual host configuration file, you must mention this directory path as the website root directory.
sudo mkdir /var/www/html/wordpressStep – 6. Download WordPress Installation Files & Extract
Use the change directory command to get the root directory.
cdNow, using the following command you can download the latest WordPress source code compressed tar file.
sudo wget -c https://wordpress.org/latest.tar.gzExtract WordPress Installation Files:
sudo tar -xvzf latest.tar.gzStep – 7. Copy Extracted Files to WordPress Directory
There are various methods on Linux to copy-paste files, but using the following rsync command you can copy-paste files between directories. Replace the highlighted wordpress directory name if you created a different one.
sudo rsync -avP ~/wordpress/ /var/www/html/wordpressStep – 8. Give Proper Permission & Ownership to the Apache
Using the following commands you will give proper read & write and directory ownership to the Apache HTTP server. It is necessary to install plugins, and themes, and upload media files on WordPress.
sudo chown -R www-data:www-data /var/www/html/wordpress/sudo chmod 755 -R /var/www/html/wordpress/Step – 9. Configure Apache Virtual Host
Apache Virtual Host is a directive file, and it allows you to host more than one website on a single virtual machine that uses Apache HTTP Server.
Create a New Virtual Host Config File:
Replace wordpress.conf with your preferred config name. You can also use your domain name to distinguish between multiple config files.
sudo nano /etc/apache2/sites-available/wordpress.confPaste the Following Lines of Code to it: You must replace the example.com domain name with your actual domain name to work the virtual host file. In case you don’t want to add your domain name then remove the two lines ServerName and ServerAlias.
<VirtualHost *:80>
    ServerName example.com
    ServerAlias www.example.com
    DocumentRoot /var/www/html/wordpress
    <Directory /var/www/html/wordpress/>
        Require all granted
        Options Indexes FollowSymLinks
        AllowOverride All
        Order allow,deny
        Allow from all
    </Directory>
   ErrorLog ${APACHE_LOG_DIR}/error.log
   CustomLog ${APACHE_LOG_DIR}/access.log combined
</VirtualHost>
Enable Apache Rewrite Module:
sudo a2enmod rewriteEnable New Created Virtual Host:
sudo a2ensite wordpress.confRestart Apache HTTP Server:
sudo service apache2 restartStep – 10. Configure WordPress (Post Configuration)
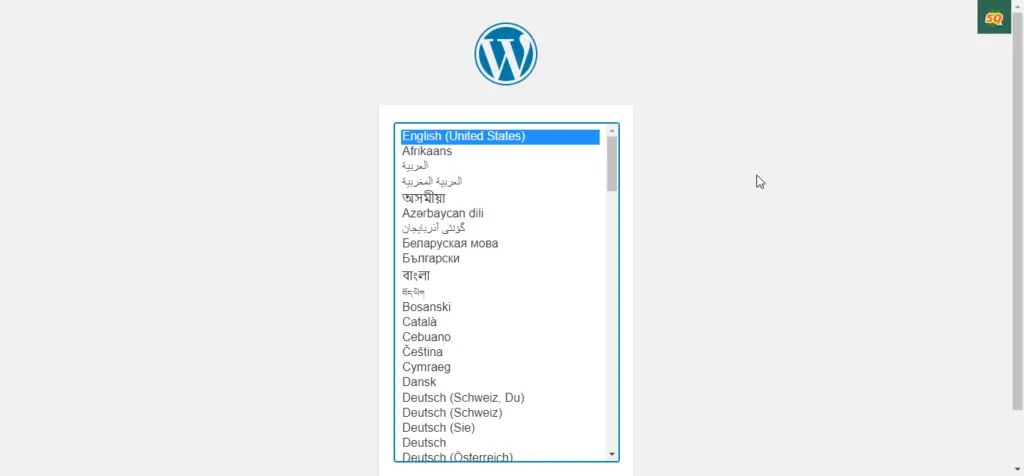
This is the final step, after all the settings are up, now, you have to configure WordPress with the database, which we have created earlier in step 4.
FAQs
Can we host WordPress websites on Oracle Cloud?
Yes, Oracle Cloud is one of the leading Cloud platforms among AWS, GCP, and Azure.
How Can I host WordPress websites for Free on Oracle Cloud?
Oracle Cloud provides a free trier plan and using that you can create two virtual machines for free. And there you can host WordPress websites for Free.
Is Oracle Cloud provide all services for free?
No, Oracle Cloud has always free trier services, which are always free with limitations. After upgrading the account you will get full access to the services.
Summary
The steps given in this tutorial will help to install WordPress on Oracle Cloud for free, you just need a valid always free tier (or a premium) account.
However, on the Oracle Cloud VM, you can install other types of applications, similar to WordPress.
If you have any issues regarding installing WordPress please feel free to contact me.